Butterscotch Cupcakes

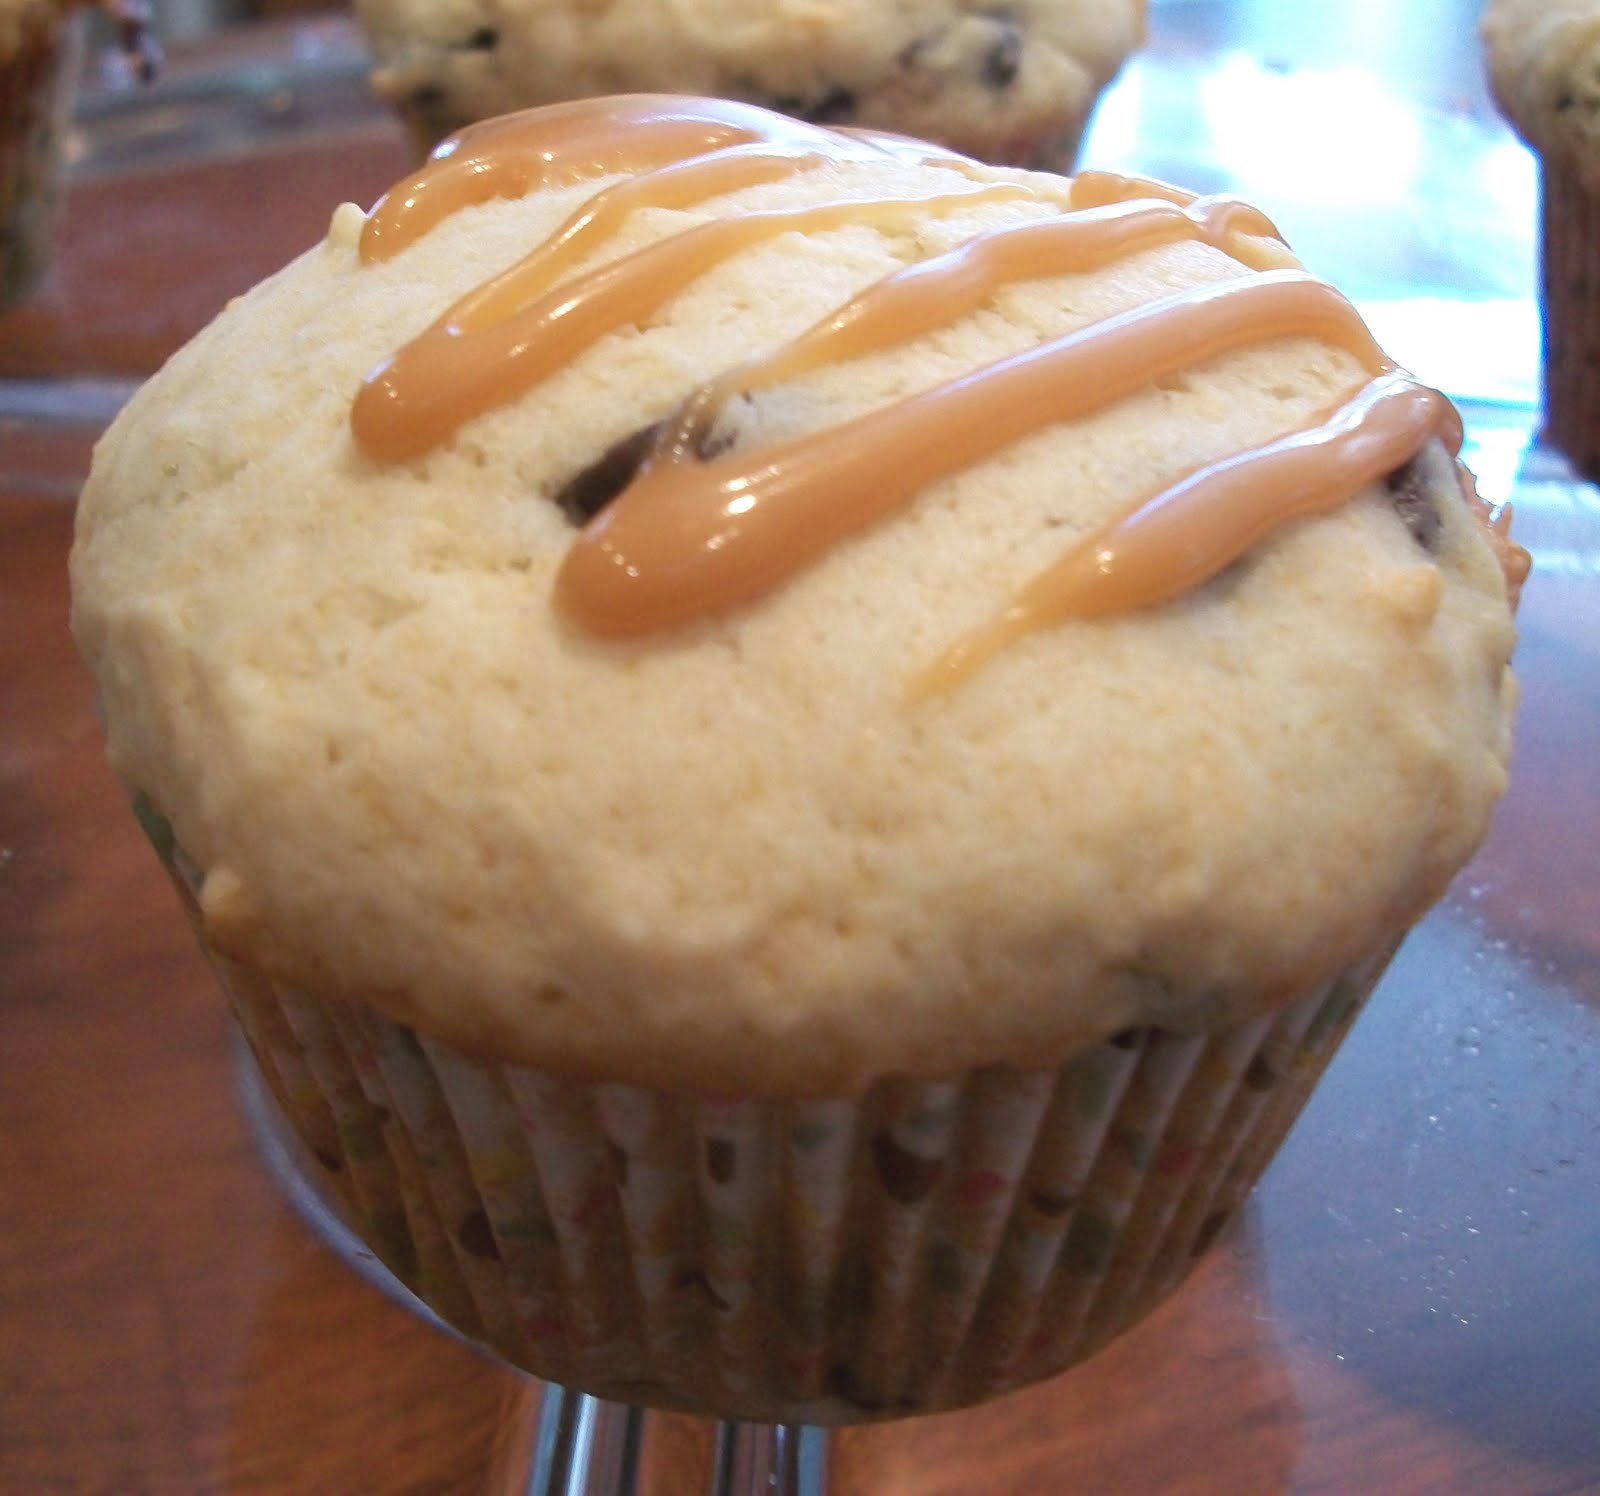
Light and moist vanilla cupcakes filled with homemade butterscotch sauce. Topped with a fluffy and creamy buttercream icing. To top it off, a sprinkle of Skor bits. It DOESN'T get any better than this !

This recipe is the current Food Network Community Challenge; a sweet concoction by Chef Ricardo Larrivée. I altered it as I went along and will share all the details below shortly !


One word: YUM !!


RECIPE as posted on the Food Network

Ricardo makes cupcakes even sweeter with homemade butterscotch and vanilla buttercream icing.

Preparation time: 15 minutes
Cooking time: 30 minutes

Ingredients

Cupcakes

  • 1 3/4 cups unbleached all-purpose flour
  • 1 teaspoon baking powder
  • 1 pinch salt
  • 3/4 cup unsalted butter
  • 1 cup sugar
  • 1 1/2 teaspoons vanilla extract
  • 3 eggs
  • 1/2 cup milk

Butterscotch

  • 1/2 cup sugar
  • 2 tablespoons water
  • 2 tablespoons Scotch (or other whisky)
  • 1/4 cup 35% cream, hot
  • 2 tablespoons salted butter

Vanilla buttercream icing

  • 1/2 cup unsalted butter
  • 1 1/2 cups icing sugar
  • 1/2 teaspoon vanilla extract
  • 3 tablespoons 35% cream, hot
Directions

Cupcakes

  1. With the rack in the middle position, preheat the oven to 180°C (350°F). Place paper or silicone liners in 9 or 12 muffin cups.
  2. In another bowl, cream the butter and sugar with the vanilla using an electric mixer. Add the eggs one at a time and beat until the mixture is smooth. With the mixer on low, add the dry ingredients, alternating with the milk. Divide the batter among the muffin cups.
  3. Bake until a toothpick inserted in the centre of a cupcake comes out clean, about 25 minutes. Let cool slightly. Unmould and finish cooling on a rack.

Butterscotch

  1. In a saucepan over medium heat, bring the sugar and water to a boil. Cook until the mixture turns golden-brown. Off the heat, add the Scotch, the cream and butter. Continue stirring until smooth. Transfer to a bowl and let cool completely.

Vanilla buttercream icing

  1. In a bowl, beat the butter, sugar and vanilla with an electric mixer until fluffy, 3 to 4 minutes. Add the cream in a thin stream and continue beating until smooth. Set aside.

Assembly

  1. Using a apple corer or a melon baller, cut a pocket from the centre of each cupcake, removing about 15 ml (1 tablespoon) of cake without cutting through. Fill the pocket with 15 ml (1 tablespoon) butterscotch. Ice the cupcakes with the buttercream icing.

My Alterations:

  • add 1/4 cup of full-fat sour cream to wet cupcake batter ingredients.
  • add 1 tsp pure vanilla extract to wet cupcake batter ingredients.
  • sift all dry ingredients before adding to wet ingredient.
  • omit alcohol from filling.
  • add 1/4 cup of cream cheese (at room temp) to icing.
  • sprinkle iced cupcakes with Skor bits for a great sugary crunch.

Chewy Mocha Dream Cookies

Thank-you Clean Eating magazine for this great recipe! It is gluten free, only 56 calories per cookie and really knocks it outta the ballpark in terms of its chocolate impact! I love them and the kids are loving them too. If your kids attend an allergy-conscious school (or any of you have nut allergies) , just omit the walnuts and voila - a healthy AND nut-free treat. But for everyone else, I highly recommend you stick to the recipe and load them up with chopped walnuts. The added crunch is divine !

This recipe is in the Feb 2011 issue of Clean Eating.
Try these out ! You will be pleasantly surprised !

LET'S GET STARTED !

RECIPE:

WHAT YOU NEED

6 egg whites at room temperature
pinch sea salt

3/4 cup organic evaporated cane juice ( I used Sucanat)

3/4 cup unsweetened cocoa powder ( I used Fry's brand)

1 teaspoon instant espresso powder

1/2 teaspoon pure vanilla extract

1 oz dark chocolate (70% or greater), chopped

1/2 cup chopped unsalted walnuts

MAKE IT

PREHEAT oven to 350F
LINE
2 cookie sheets with parchment paper. * Though the recipe didn't call for it, I highly recommend you spray your parchment paper with cooking spray to avoid any sticky messes!*
IN LARGE BOWL, beat egg whites with salt using an electric beater until soft peaks form.
GRADUALLY add cane juice and continue beating until stiff peaks form.
FOLD in cocoa powder, espresso, vanilla, chocolate and walnuts and mix until combined (the recipe said no need to fold but trust me on this !)
DROP batter by rounded tablespoon onto prepared cookie sheets, dividing evenly. This recipe should make about 24 cookies.
BAKE 1 cookie sheet at a time on oven's middle rack for 10 to 12 minutes per sheet, until cookies are no longer shiny.
ALLOW to cool 5 minutes before removing from sheet. PLACE on cooling rack until they cool entirely. If these tend to stick somewhat to parchment just use a hard spatula to quickly lift them off the parchment.

These are chewy, sticky and just plain GOOD !


STORAGE TIPS: I recommend storing these in the fridge.
I also recommend you keep them in a simple plastic container with a lid.
Line the bottom with wax paper, then layer with one single layer of cookies,
top with another piece of wax paper and continue.
If the cookies come in contact with one another they will stick together.
I learned this the hard way after I took the photo at the top of this recipe entry !

Old-Fashioned Banana Roll

Just like the banana roll I used to buy my Granny at Woolworths many, many years ago! This is a lovely light banana cake with a whipped cream icing.

What brought this on? As I walked into my kitchen to put on a pot of tea, I was greeted by the smell of an overripe banana. And sure enough, there it was. One lone banana overly ripe on the counter -- not enough for muffins or a quick bread. So now what? Freeze it for good use later? Or throw it out?


And then I remembered!


Like a candy-coated flashback, it all came back. Little me as a teeny-bopper picking up a sweet banana roll at Woolworths on my way home one Saturday for a weekend visit.
After that first purchase it became the norm - a banana roll was toted home
(along with my dirty laundry) each and every visit !

This brought back many fond memories. I hope it does the same for you.
And if not, well then you can bet it will create new superb memories
for you to enjoy in the future!


Rather than trying to put together a recipe from scratch with the hopes of mimicking the real thing, I figured there was no way I was the only person who loved and missed this little dessert. My Google research led me to find a recipe that I was sure was my ticket to recreating the Woolworths Banana Roll and I found it here at Tasty Home.
I did adapt this version though as I went along.

I am not a jelly roll superstar. To be honest, this is the FIRST one I have ever baked.
I am proud to say it came out perfectly!


LET'S GET STARTED !

To begin, I greased a cookie sheet (as I had no jelly roll pans hanging around)
and lined it with parchment paper with 2 inch overhang.
Then I greased the parchment paper too !


The batter was simple but beware, have 3 mixing bowls handy before you begin.
I smoothed it into the pan and hoped for the best.


10 minutes in the oven and out it came to be immediately transferred
to a tea towel which was pre-dusted with icing sugar.
Then I simply, and gently, rolled up the cake into a little log.
I let it sit for a good hour before icing.

Yes, there is a little jelly roll all tucked away in here.
I couldn't stop touching it while it was still warm and swaddled in the tea towel.
It felt like a kitten wrapped up in a blanket (and yes, in a GOOD way!!)


Let the icing begin !


So two amazing things occurred today:
I conquered my fear of jelly roll baking and I recreated a memory!
I brought the past into the present!


RECIPE:

WHAT YOU NEED

FOR THE ROLL

1 cup sifted cake flour
1/2 teaspoon baking soda
1/8 teaspoon baking powder
1/4 teaspoon nutmeg
1/8 teaspoon salt
1/2 cup mashed ripe banana (1 large banana works)
1 tablespoon full-fat sour cream
5 1/2 tablespoons unsalted butter at room temperature
1/2 cup fine granulated sugar
1 large egg at room temperature

FOR THE FILLER ICING

3/4 cup heavy cream
2 tablespoons sour cream
1 tablespoon fine granulated white sugar
1 teaspoon pure vanilla extract
1 teaspoon banana extract
1 package of Whip It

MAKE IT

PREHEAT oven to 350F
GREASE a cookie sheet or jelly roll pan
LINE with parchment paper ensuring 2 inch overhang on all sides
IN MEDIUM BOWL, SIFT flour, baking soda, baking powder, nutmeg and salt.
IN SMALL BOWL, MASH banana and combine with sour cream.
IN LARGE BOWL, CREAM butter until it is smooth (1-2 minutes medium speed with hand-mixer).
ADD sugar and scrape sides of bowl if necessary.
CREAM SUGAR and butter for 2 minutes medium speed.
ADD egg and continue to beat 2 minutes.
SLOWLY add half flour mixture, then banana mixture and end with remaining flour mixture. MIX until smooth.
POUR batter into pan and use icing spatula or knife to spread evenly.
BAKE for 10 - 12 minutes until top starts to turn golden brown.

REMOVE from oven
LAY a tea towel on your work surface and dust with icing sugar
INVERT cake onto tea towel and ROLL up with towel.
ALLOW to cool for 1/2 hr.

MAKE ICING:

COMBING all icing ingredients blending at medium to high speed with a hand-mixer
until smooth and thickened.

ICE THIS BABY !!

UNROLL cake slowly (if it starts to stick gently pull towel off cake) and spread with 1/2 of icing
ROLL up slowly and cover with remaining icing
SPRINKLE top of jelly roll with chopped walnuts


ENJOY! This one is to remember!!

Vanilla Sour Cream Cupcakes with Fudge Icing

These lovely little jewels are dense and moist thanks to egg yolks and sour cream. Top them off with a chocolate fudge icing and you are in business !

This recipe is one of my faves; simple yet effective !!! I found it years ago in a fantastic baking cookbook.

The icing is just a buttercream base with added melted semi-sweet and unsweetened chocolate. You cannot go wrong with buttercream !

A vanilla buttercream icing would work just as well. And for Easter, think about tinting it a pastel shade of green, yellow, pink or blue !


The Secret (to a superb yellow cupcake) Lies Within.
For those not lucky enough to own this little gem,
I will repost the recipe here with a few alterations.


LET'S GO !!

RECIPE:

WHAT YOU NEED

FOR THE CUPCAKES:

1 1/2 cups all purpose flour
1 cup fine white sugar
1 1/2 teaspoons baking powder
1/4 teaspoon salt
1/2 cup unsalted butter at room temperature. Cut into 1/2 inch pieces
1 large egg at room temperature
2 large egg yolks at room temperature
1 1/2 teaspoons pure vanilla extract (love Madagascar vanilla in these!)
1/2 cup full fat sour cream at room temperature


FOR THE ICING:

2 ounces of dark baking chocolate
2 ounces semi-sweet chocolate (you can go with baking chocolate or even chocolate chips)
2/3 cup unsalted butter @ room temperature
1 1/3 cups sifted icing sugar
1 teaspoons pure vanilla extract


MAKE IT

PREHEAT oven to 350F
GREASE 12 muffin cups or LINE with paper liners (I am always a fan of liners!)
IN A LARGE BOWL, whisk together first four ingredients
WITH ELECTRIC HAND-MIXER, add all other ingredients and blend until combined
DIVIDE batter evenly among muffin cups
BAKE for 20-25 minutes or until toothpick inserted in middle comes out clean
ALLOW to cool in muffin tin 5 minutes
REMOVE cupcakes and allow to cool 1/2 hr on a cooling rack before icing


Ready to be iced


MAKE THE ICING:

CHOP chocolate into small pieces
IN A SMALL MICROWAVE SAFE BOWL, combine dark and semisweet chocolate
MICROWAVE 30 seconds at 50% power
STIR and microwave again 30 seconds at 50% power
STIR and if melted then great ! If not, back in it goes
ONCE MELTED, allow to cool to room temperature
IN SEPARATE LARGE BOWL, whip butter with electric hand-mixer until light and fluffy (2-3 minutes at medium speed)
SIFT in icing sugar and mix until blended (1 minute at medium speed should do it!).
ADD vanilla extract and mix til combined.
ADD cooled chocolate mixture and blend until well combined.

ICE the cupcakes: I used a 1M Swirl Wilton piping tip.

My little assembly line


The Desired Result

PW's Raspberry Cobbler

I made an incredibly easy and tasty raspberry cobbler this evening. The entire family devoured it ! Thanks goes to The Pioneer Woman for a lovely recipe from her cookbook "The Pioneer Woman Cooks". I purchased this book yesterday and couldn't wait to get started !

This recipe can be found on her website and I will simply direct you to her link versus re-posting.

I do have some pictures to share of my cobbler baking experience though and I do hope you enjoy them. If they inspire you to cook this gorgeous dessert then all is truly well in the world.

ONE OF THE EASIEST COBBLERS I HAVE EVER MADE

A simple blend of butter, self-rising flour, milk and sugar creates the base.
Then feel free to choose your fruit - I opted for raspberries.


It emerged from the oven golden, crispy-edged and glittering with sugar


And it didn't last long. I served it with vanilla ice cream.
Whipped cream on this would be great too! As you can see, we dug in !


Don't wait another moment: The Pioneer Woman's Cobbler recipe

Peanut Butter Cookies

Peanut Butter Cookies - an old favorite among many. This was a recipe my mom used to make when I just a little lass.

For the peanut butter, I had great ideas to inject some kind of "healthy" version of it into these lovelies and go with pure and natural peanut butter. My advice: DON'T DO IT ! Stick to your typical Skippy or Kraft brands for best results.

I had also initially intended to jazz these up a bit - dipped in chocolate or even just drizzled. But honestly, why mess with a good thing? I hope you enjoy these as much as I do.


LET'S GET STARTED !

RECIPE:

WHAT YOU NEED

1/2 cup fine white sugar
1/2 cup firmly packed brown sugar
1/2 cup butter at room temperature
1/2 cup smooth peanut butter
2 tablespoons milk
1 teaspoon pure vanilla extract
1 large egg at room temperature
1 3/4 cups all purpose flour
1 teaspoon baking soda
1/2 teaspoon salt

MAKE IT

PREHEAT oven to 375F
LINE 2 cookie sheets with parchment paper
IN LARGE BOWL, combine first 7 ingredients. Hand-mixer works well on medium speed
SIFT in flour, baking soda and salt
STIR until combined
ROLL dough into 1 inch balls and place 2 inches apart on cookie sheets
DIP a fork in sugar and flatten dough in crisscross pattern
BAKE for 10-12 minutes (mine needed the full 12)
REMOVE from cookie sheet and let cool completely on wire rack


This recipe can also be used to make PEANUT BUTTER KISS cookies.


Simply do not flatten dough, roll in sugar and bake for same amount of time.
When done, remove from oven and press Hershey chocolate kisses down into center of cookies until they crack around the edges.


ENJOY !!!!

Foodie Friday (Feb 25, 2011)


Sweet Tooth Friday ( Feb25, 2011)


Chocolate Chip Butterscotch Muffins

My daughter tried the Tim Horton's chocolate chip caramel muffin last week and announced it was not a hit. So I decided to make my own and see if I could beat the "not a hit" Tim's muffin.

It was an easy peasy challenge to be honest. These were so simple to make and the caramel filling: melted butterscotch chips and 2-3 tablespoons of heavy cream.


LET'S GET STARTED

The muffin recipe is by Williams-Sonoma. The only thing I altered was adding
butterscotch cream to the centers and drizzled over top.

RECIPE as posted by Williams-Sonoma

See bottom of recipe for my adapted version !

Ingredients:

  • 2 1/2 cups all-purpose flour
  • 3 1/2 teaspoons baking powder
  • 1/2 teaspoon salt
  • 12 tablespoons (1 1/2 sticks) unsalted butter, at room temperature
  • 1 cup plus 1 tablespoon sugar
  • 2 eggs, at room temperature
  • 1 1/2 teaspoons vanilla extract
  • 3/4 cup milk
  • 1 cup semisweet chocolate chips


Directions:

Before you start
Preheat an oven to 350°F. Line a 12-cup muffin pan with paper liners.

Mix the batter
In a bowl, using a wooden spoon, stir together the flour, baking powder and salt.

In a large bowl, using an electric mixer, beat the butter and the 1 cup sugar on medium speed until creamy, about 3 minutes. Turn off the mixer and scrape down the bowl with a rubber spatula.

Add 1 egg and beat until blended. Add the other egg and the vanilla and beat until well blended. Turn off the mixer and scrape down the bowl with the rubber spatula.

Add half of the flour mixture and beat on low speed just until blended. Pour in the milk and beat just until blended. Add the rest of the flour and the chocolate chips and beat until blended.

Fill the muffin cups
Using 2 large spoons, one to scoop and one to push, fill each lined muffin cup with batter. Sprinkle the 1 tablespoon sugar evenly over the tops.

Bake the muffins
Put the pan in the oven and bake until the muffins are golden brown and a toothpick inserted into the center of a muffin comes out clean, 21 to 23 minutes.

Remove the pan from the oven, set it on a wire rack and let cool for 20 minutes.

Tip the muffins out of the pan onto the rack and serve warm or at room temperature. Makes 12 muffins.


For My Version: MELT 1 cup of butterscotch chips with 4 tablespoons heavy cream. Fill muffin tins 1/2 way with batter. Add 1 teaspoon of butterscotch cream mixture. Cover with batter to top of muffin liner. When cooled, drizzle each muffin with leftover butterscotch cream.


OUR COOKIE CHALLENGE

My daughter and I have decided to start our own family challenge - the goal: no more store bought cookies.

What does this mean?
It means Lemon Drop will seem theme-driven for awhile (cookies, cookies and yup, even more cookies). Don't worry, I will slip a cake, pie, dessert bar, pudding, scone ( hey, you name it!) in here often too. But it is safe to say there will be plenty of cookie recipes posted as we test our dedication to this latest venture !


Our first cookie chosen to kick-off the challenge is a sandwich cookie. This cookie has a shortbread texture with a lovely cinnamon flavor. The dough comes together very easily; just let it rest for 1/2 hr in the fridge and the rolling can begin.

This cookie recipe makes 2 discs of dough. For the first one, we went with strawberry jam filled centers dusted with icing sugar. For the second batch, the kids decided on Nutella filled heart sandwiches again dusted with icing sugar. It is a toss up for me - they are both very yummy!

This is such a versatile little cookie that you can go with whatever filling you like. A chocolate ganache or even a lemon curd center in these would be phenomenal !

Nutella filled hearts


My base cookie recipe is one I found on Canadian Living awhile ago. Here is the recipe for Cinnamon Sandwich Cookies , as posted verbatim, from their website. As you can see above, I used 3 cookie cutters: a round one for the cutout cookies, a smaller round one to remove the centers, and a heart shaped cutter for the sandwich cookies.

RECIPE

Ingredients
    3/4 cup (175 mL) butter, softened
    3/4 cup (175 mL) packed brown sugar
    1 egg
    1 tsp (5 mL) vanilla
    2-1/2 cups (625 mL) all-purpose flour
    1-1/2 tsp (7 mL) cinnamon
    1 pinch salt
    2 tbsp (25 mL) icing sugar
    1/2 cup (125 mL) seedless raspberry jam

Preparation

In bowl, beat butter with brown sugar until fluffy; beat in egg and vanilla. In separate bowl, whisk together flour, cinnamon and salt ; stir into butter mixture in 2 additions, blending with hands if necessary to bring dough together.

Divide dough in half and flatten into discs; wrap and refrigerate until firm, about 1 hour. (Make-ahead: Refrigerate for up to 24 hours.)

Between waxed paper, roll out each disc to 1/8-inch (3 mm) thickness. Using floured 1-1/2 inch (4.5 cm) fluted round cutter, cut out shapes. Using 1/2-inch (1 cm) piping tip or mini-cutter, cut out centres of half of the cookies.

Arrange rounds and rings, about 1 inch (2.5 cm) apart, on parchment paper–lined baking sheets. Freeze or refrigerate until firm, about 15 minutes in freezer, 30 minutes in refrigerator.

Bake in 350°F (180°C) oven until edges are golden, about 12 minutes. Transfer to racks; let cool.

Using fine sieve, sprinkle rings with icing sugar. Spread about 1/2 tsp (2 mL) jam over each of the remaining cookies; top each with ring.

The result: a lovely plate of goodies!

Jam Filled Circle Cutouts


and Nutella Filled Hearts


R
eady to be thoroughly enjoyed by all !


Traditional Buttermilk Tea Biscuits

Light and fluffy traditional buttermilk tea biscuits! I woke up today craving one topped with butter and jam. So I got baking bright and early. These are a wonderful way to start off the morning.

The biscuits have incredible rise and are layered with flaky, buttery goodness. Plus the recipe is so simple there really is no excuse not to make them part of your weekly baking regimen.

RECIPE:

WHAT YOU NEED

2 cups all-purpose flour
1 1/2 tablespoons sugar
1 1/4 tablespoons baking powder
3/4 teaspoon salt
cold butter (1/2 a cup or 1 stick of butter) *grated.
1 cup of buttermilk

* The butter must be very cold. Grate it against the wide side of your grater

MAKE IT

PREHEAT oven to 400F
LINE one baking sheet with parchment paper

WHISK together first 4 ingredients
ADD grated butter, combining with a fork. Dough should resemble coarse crumbs.
ADD buttermilk and stir until dough comes together in a shaggy mess - hey, no other way to describe it!
LIGHTLY flour work surface
MOVE dough onto work surface and pat into a square about 1 inch thick
FOLD dough in half
PAT dough gently down into 1 inch thick square
WITH floured biscuit cutter or drinking glass, cut out circles. This recipe made 7 large biscuits for me.
PLACE biscuits on parchment lined baking sheet
MAKE a small indentation in the top of each biscuit. This will prevent them from flopping over when they rise during the baking process

BAKE for 15-18 minutes. Mine were perfect at 16 minutes on the dot !
REMOVE immediately from baking sheet and allow to cool on rack slightly

Top with butter, jam, lemon curd, clotted cream... the list goes on and on.

Decadent Chocolate Truffle Pudding

My kids have been asking me for weeks now to make homemade chocolate pudding. One reason is because the school board is adamantly pushing for "green lunches". School lunches are famous for waste: cellophane wrappers, juice boxes and those little plastic throwaway pudding containers. Homemade pudding nestled nicely into reusable containers helps make my kids lunches a tad "greener".

The other reason why they are insisting I make pudding? Homemade is simply BETTER !

I decided I wanted to kick it up a notch though and turn it from delicious into DECADENT. What did I do? Took a basic Martha Stewart pudding recipe, altered it a fair bit and loaded it up with chocolate truffles. I used Lindor milk chocolate truffles I had left over from Valentine's Day but you could use any soft centered chocolate truffle you like. A dollop of whipped cream to finish it off and you have one insanely satisfying dessert. Omit the whipped cream and spoon pudding into little reusable containers and you have an amazing, and portable, school treat !

HERE WE GO !!!

A bowl of chocolate. YUM!


Strained and now mixed with chocolate, vanilla and butter


RECIPE: adapted version of Cooking Together: Chocolate Pudding - Martha Stewart Kids

WHAT YOU NEED

2 tablespoons cornstarch
3 tablespoons granulated sugar
3 tablespoons cocoa powder
1/8 teaspoon salt
1 cup heavy cream
1 1/4 cups milk
2 large eggs
5 oz of Lindor chocolate truffles (approx 8-10). You can also use your favorite soft center chocolate truffle if you prefer
1 oz of semi-sweet or dark baking chocolate, chopped
1 teaspoon pure vanilla extract
2 tablespoons of cold butter, cubed

MAKE IT

WHISK together cornstarch, sugar, cocoa powder, and salt in a heavy-bottom medium- size saucepan.
ADD cream, milk, and eggs. Whisk until combined.
SET pan over medium heat. Whisk slowly and constantly, making sure to scrape sides of pan, just until pudding begins to boil, 7 to 8 minutes.
REDUCE heat and continue stirring until pudding coats has thickened to desired consistency; it should easily coat the back of a wooden spoon.
REMOVE saucepan from heat

STRAIN pudding through a wire sieve into a medium heat proof dish.
WITH a wooden spoon or silicon spatula, gently add vanilla, butter, truffles and chopped baking chocolate. Stir until all is melted and well combined.
COVER with plastic (make sure to push plastic wrap right down onto pudding surface to avoid a skin forming).
REFRIGERATE until thick and well chilled, approx. 1 hr.

SERVE with sweetened whipped cream and chocolate shavings.


Featured Here Today: Feb 18,2011
FOODIE FRIDAY !


Top photo by Viktorfisher

Giant Lemon Sugar Cookies

Reading my blog roll today I was pleasantly surprised to see a gorgeous photo of a stack of Giant Lemon Sugar Cookies. I was instantly intrigued. I could almost smell the citrus. Spring was in the air.

So I put down the cup of coffee and dove in. Before long you could smell lemon throughout the house.


The result is one incredible cookie!
These are crisp on the edges, chewy in the middle
and big enough to hold with two hands!
Cheers to after-school snacks - here's hoping I didn't set the bar too high !

This recipe was featured today on One Perfect Bite.
With Mary's permission, I am reposting the recipe here and sharing the love !

HERE WE GO !!!


This recipe calls for the zest of two lemons.
I love how Mary adds the zest to the rolling sugar for that extra kick !


The dough came together in a snap; a rich heavenly dough laden with butter and fresh lemon juice and zest. I will admit that yes, I ate raw cookie dough today.
Trust me, you would have too !


Balls of chilled dough rolled in lemon infused sugar


Now to figure out what to use to press them down into 1/2 inch deep circles. I tried a glass and that didn't work. It left strange indentations. A saucer was too large. And then I saw it. This little plastic gadget the kids use to make egg sandwiches.


It worked !!! Perfectly pressed and ready for the oven !


These are truly beautiful and won't last long !


RECIPE as posted on One Perfect Bite

Giant Lemon Sugar Cookies ...from the kitchen of One Perfect Bite adapted from Taste of Home

Ingredients:
2 cups sugar, divided use
Zest of 2 large lemons, divided use
1 cup butter, softened
2 large eggs, at room temperature
1 to 2 teaspoon lemon extract
1 tablespoon lemon juice
2-3/4 cups all-purpose flour
1/4 teaspoon salt
2 teaspoons cream of tartar
1 teaspoon baking soda

Directions:

1) To make lemon sugar: Combine 1/2 cup sugar with 1 teaspoon lemon zest in the bowl of a mini-food processor. Pulse until lemon zest is incorporated into sugar. Pour into a small bowl and stir to break up any clumps. Set aside.
2) To make cookie dough: Combine flour, salt, cream of tartar and baking soda in a medium bowl. Set aside. In a large mixing bowl, cream butter with reserved 1-1/2 cups sugar. Blend in eggs, one at a time. Add lemon extract, lemon juice and reserved lemon zest. Add flour mixture, one cup at a time, blending well after each addition, until all flour is incorporated.
Refrigerate dough for at least 1 hour.
3) To bake cookies: Preheat oven to 350 degrees F. Shape dough into balls using 2 tablespoons of dough for each cookie. Roll in reserved lemon sugar. Bake in batches of six cookies per 18 x 13-inch baking sheets. Place balls of sugar coated dough on cookie sheets. Press down with the bottom of a glass or measuring cup until cookie is about 1/2-inch thick. Bake cookies for 12-14 minutes. Remove tray from oven. Let cookie sit on tray for 5 minutes before transferring to cooling rack. Yield: 24 saucer-sized cookies.

ENJOY !!!!!!

Fudge Brownies with Chocolate Chips

Fudgie brownies studded with milk chocolate chips. These are dense, moist and just too good to only have one !

These are very easy to make and contain 4 hits of chocolate: unsweetened, dark, cocoa and milk chocolate chips! A quadruple whammy of goodness.

Not many pics today as I made these late last night and was too tired to snap as I went along.


RECIPE:

WHAT YOU NEED

3/4 cup unsalted butter cut into chunks
2 ounces unsweetened chocolate chopped
3 ounces dark chocolate chopped
1 tablespoon cocoa (Fry's works great)
1 1/2 cups fine white sugar
1 teaspoon pure vanilla extract
1/4 teaspoon salt
3 large eggs at room temperature
1 cup all purpose flour
1 cup milk chocolate chips

MAKE IT

PREHEAT oven to 350F and grease an 8inch square baking pan
MELT butter, unsweetened and dark chocolate slowly in a double boiler until smooth
WHISK cocoa into melted butter/chocolate mixture and let cool 15 minutes
IN LARGE BOWL, combine sugar, vanilla and salt
ADD cooled chocolate mixture and stir until well blended
ADD one egg at a time, stirring with a wooden spoon or spatula after each egg addition
ADD flour, blending just until combined. I like folding it in with a spatula to reduce the possibility of overmixing
GENTLY fold in chocolate chips
POUR batter into prepared pan

BAKE for 35 minutes. Toothpick test in center should be almost clean
REMOVE from oven and allow to cool on rack completely
CUT into squares and ENJOY !

TIP: dip knife into hot water to ensure a clean cut. Wipe off knife of all brownie residue after each cut, dip in hot water and cut again !

These little brownies would also be delicious with a simple buttercream icing and topped with sprinkles or a candy heart to liven things up a bit :)


White Chocolate Pecan Banana Bread

Banana Bread - a childhood favorite. An adult favorite. Hey, it is an ALL TIME favorite!

This one is loaded with chunks of white chocolate and chopped pecans.

I grew up eating slices of banana bread topped with butter. There truly is nothing comparable.


HERE WE GO !

Some of your basic ingredients: overripe bananas, white chocolate and pecans


Rather than going with one large loaf pan I decided to use 4 small loaf pans.
When moving to smaller pans, I had to reduce the baking time
by approximately 10 minutes.


4 little loaves of delight cooling for a bit in their pans


Golden brown and baked to perfection. All it takes is a 350F oven for 35 minutes!


The sweetness of the white chocolate plus the crunch of pecans
make these little guys BIG WINNERS !


RECIPE:

WHAT YOU NEED

1 2/3 cups all purpose flour
2 teaspoons baking powder
1/2 teaspoon salt
1/4 teaspoon baking soda
1/2 teaspoon cinnamon
1/4 teaspoon nutmeg
3 medium or 2 large very ripe bananas, mashed
2/3 cup fine white sugar
1/3 cup of vegetable oil (I use Becel)
2 large eggs at room temperature
1 teaspoon pure vanilla extract
3 squares of white baking chocolate, chopped
3/4 cup chopped pecans

MAKE IT

PREHEAT oven to 350F
GREASE 4 small loaf tins or one 8 1/2 x 4 1/2 inch loaf pan

COMBINE flour, baking powder, salt, baking soda and spices with whisk
MASH bananas
ADD sugar to bananas and stir with wooden spoon until well combined
STIR in oil, eggs and vanilla to banana mixture until well blended
ADD flour to banana mixture and stir just until combined. Do not overmix
FOLD in baking chocolate and pecans

DIVIDE batter between 4 loaf tins or one large loaf pan
RAP tins gently on counter to remove any air bubbles

BAKE for 35 minute if using 4 small loaf tins or 45 minutes (checking with a toothpick at 40 minutes)

ALLOW loaves to cool in tins on a baking rack for 5 minutes
REMOVE loafs from tins and let cool completely. Trying to slice a loaf while it is still too warm can result in one big mess!

HAUL out butter, spread on a nice thick slice and ENJOY !!